Browse products by
Filter By Type
Filter By Finish
Filter By Look
Filter By Application
Filter By Type
Filter By Look
Filter By Application
Filter By Size
Unique Tips to Make Kitchen Floor Tiles Always Clean and Look New
Dec 2021
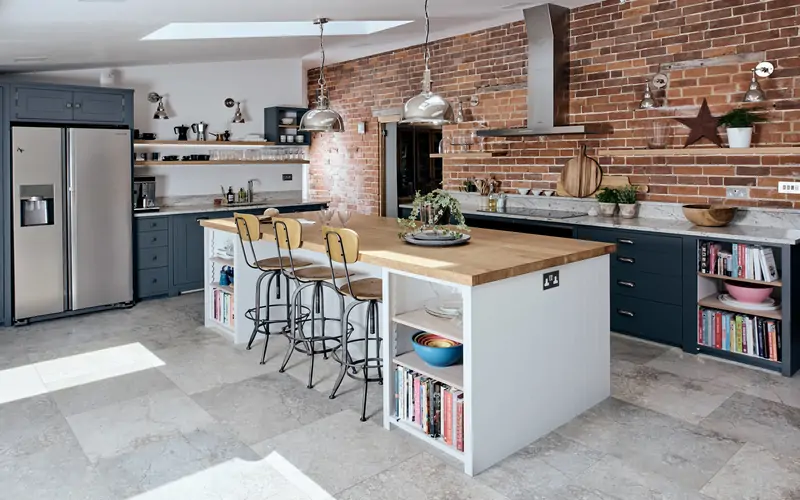
The importance of keeping your kitchen floor tiles can not be more overstated. A kitchen is where you cook; it is where your loved ones often meet up; it is the heart of your home! Hence, keeping your kitchen floor tiles clean is an important step to a healthy kitchen and in turn a healthy home. A clean kitchen will make your space more attractive while aiding in reducing the risk of exposure to numerous risky pollutants such as bacteria and allergic dust.
Because the kitchen is where food is stored, prepared, and eaten, spilling is inevitable in this area! Food spills & oily fumes that are so evident in kitchens, if not attended regularly, may aid in the accumulation of microbes and result in numerous illnesses. What breeds on your floor tile can next be on your food, kitchen utensils, counters, appliances, and especially your hands. So, it is important to take the necessary steps to clean kitchen floor tiles before, during, and after preparing and eating your food to keep you and your family safe.
We’ll show you how to clean kitchen floor tiles in this article. This article is just for you, if you want your kitchen tiles to be bright and shiny. Let’s face it, no one likes to spend a whole night or weekend cleaning; this method is also quick and easy to implement, and it makes use of cleaning products and supplies that you probably already have in your laundry room! It’s a simple and quick way to clean your kitchen floor tiles and make them pristine. So, let’s get started!

It’s critical to identify the kind of kitchen floor tiles you have before beginning the cleaning procedure! Does your kitchen have Ceramic or Porcelain Floor Tiles, or something else entirely? If you have the ceramic/porcelain option, both of these floor tiles are quite durable, and with a few simple cleaning methods, you can keep them looking brand new. For cleaning your ceramic and porcelain tiles, follow these simple steps given below:
De-grime it!
To keep your kitchen floor tiles looking new, sweep or vacuum them regularly. Although ceramic tiles are dirt-resistant, sand and grit can degrade the glazed surfaces.
Use good quality Mops!
Use a rag or soft mop and clean the floor tile with mild detergent and clean water. Since sponge mop tends to force dirty water into the grouts-making them harder to clean- soft mops are ideal for cleaning floors. While mopping, ensure changing the water frequently; unclean water produces a foggy floor.
Look out for stains!
Look out for stains or discolorations on your floor tiles. if you find any stain, strive to figure out what caused it and use a proper cleaner accordingly!
Remove soap residue!
Accumulation of soap residue may give your floor tile a hazy appearance. To avoid this, use a commercial all-purpose cleaner to remove the residue. If you don’t have a commercial cleaner, you might also use lime juice or mild acid to clean the residue.
Don’t let floors dry out!
Allowing your kitchen floor tile to dry out naturally will result in water stains. Right after washing the floor, make sure to dry it with a clean, soft cloth.
What is the most effective approach to clean grout?
Grout is the most difficult part to clean, and it may quickly discolor over time in a kitchen due to filth and oil. Discolored grout, no matter how brilliant your tiles are, may make your kitchen seem untidy.
Although there are a variety of grout cleaning options available, the quickest and most effective method is to use baking soda, warm water, and a toothbrush!
Make a paste by mixing baking soda and warm water. If you like, replace the warm water with white vinegar. Then scrub this mix in the grout with a toothbrush. Let the paste dry for at least 25 minutes and then wash it thoroughly with warm water and clean it with a cloth. Repeat the procedure in areas where the stains are stubborn.
Cleaning Stone Floor Tiles:-
Whenever you’re thinking of cleaning natural stone tiles, always be cautious as traditional cleaners contain chemicals that can damage the floor tiles. So, use cleansers formulated exclusively for stone coverings to clean your floor tiles.
The most important thing to remember while cleaning stones is to avoid using an alkaline or acidic solution as they both can damage the floor’s sheen. Always use a neutral cleanser; a pH of 7 is considered neutral. Acidic solutions below 7 can damage the adhesive. A ph of more than 7 is considered alkaline which is good for eliminating oil and grime but can leave a harmful residue if not washed properly.
A simple home remedy for stone tiles:
Mix water and baking soda to prepare a paste, and apply it to the stain in a thick layer. Allow it to sit for 1 day before wiping it away with a moist towel. The paste absorbs the oil from the stone. However, if the stain persists, repeat the same procedure again. Moreover, you can set rugs or doormats at the doorways of your home to prevent scratches from objects being dragged, which can harm the stone tile.
REGULAR FLOOR TILE MAINTENANCE
If you want to extend the fresh look of your floor tiles for years, given below are a few simple tips:
- Vacuum your kitchen floor tiles on a regular basis to ensure that no food stains stick to them for an extended amount of time.
- Clean up spills right away to avoid stains. Clean floor tiles regularly to keep dirt and oil from building up.
- Carrying out this simple procedure on daily basis will prevent dirt from accumulating and keep your kitchen look intact and clean.
How often do I clean my kitchen floor tiles?
No matter the type of flooring, a soft-bristle vacuum attachment can be utilized, although it may be difficult to use it in corners or narrow places. Finish the task with a hand brush and dustpan. Schedule a kitchen cleaning every two weeks and once every few months, or anytime your grout becomes dirty, take the effort to clean them.
A note from LAVISH
Hope the article was helpful! Stay tuned for more upcoming articles on tiles and design. Also, the next time you clean your floor tiles, don’t be overwhelmed by the procedure of cleaning. Take it easy and proceed slowly! Maintaining the tiles properly will assure that you never have to change a single tile for decades.
Also, don’t forget to check out our numerous inspirations, including wall tile, floor tile, and more to create your next dream space!
Similar Articles


That which is unique is always rare and special, so is with the finesse of Lavish tiles. Lavish is synonymous with excellent quality tiles that define the beauty of a well tiled space. One of the largest manufacturer and exporter of ceramic tiles, wall tiles and floor tiles, double charge vitrified tiles, polished glazed vitrified tiles, glazed vitrified tiles and digital tiles, Lavish is famous for adding that sense of grandeur and splendor through sheer product quality.


