Browse products by
Filter By Type
Filter By Finish
Filter By Look
Filter By Application
Filter By Type
Filter By Look
Filter By Application
Filter By Size
How to Find the Number of Tiles Required on the Floor? – Tile Calculator
Mar 2024
Up for your new renovation project but don’t know how to find the number of tiles required on the floor? Well, you have reached the right site!
Renovating can be a tough job as it brings fresh challenges each time you add something new. The situation becomes even more taxing when you have to deal with floor tiles and you don’t know how to get the numbers right.
You cannot even begin the tile project until you have at least a rough idea of how many tiles will be needed. Ensuring you don’t squander money by buying too many or too few tiles, thus, becomes a crucial step in the process. So, be with us as we explain to you how to find the number of tiles required on the floor.
Know your Space First
We are starting with introducing you to your space. Though it might appear insignificant, it holds a very useful spot in the complete installation activity. Before beginning the measurements, ask yourself the following questions:
1. What is Your Room’s Location?
When making a choice, location is imperative. In larger spaces and regions that should have a magnificent appearance, you can choose to install larger tiles. Contrary to this idea, you might want small tiles in areas with minute detailing or where you like to have a cozy feel. Hence, the total number of tiles will be determined proportionately.
2. What is the Size of the Room?
Well, obviously you’ll need to know what your room size is. Once you’ve picked your tile and have the room’s measurements, calculating the required amount is straightforward.
3. What is the Design and Pattern of your Chosen Tile?
Some may feel that this question is irrelevant, but it has a variety of effects. Depending on the use, certain designs might only be available for large or tiny tiles, or tiles of different grades. Eventually, the calculation of tiles will be affected by the design and pattern you pick.
4. What is the interior theme of your home?
The concept of renovation is centered on making the most possible use of the available light and space in your home or business. Therefore, your chosen tile design, pattern, finish, and number will all depend on your interior design.
Finding the Best Tiles for the Area
After you finish preparing the space, the next step is to choose your tiles. Apart from looks, consider the material for everyday durability. For strong flooring, opt for vitrified tiles; for slippery areas, choose anti-skid tiles. You can also find tiles that are germ-free, moisture-resistant, thermal-proof, etc. Broadly, you can choose among:-
Ceramic Tiles
Robust, reasonably priced, and ideal for low-to-medium foot traffic areas such as living and dining rooms at home. Ceramic tiles may be used to match any interior motif because they come in a variety of sizes and prints.
Porcelain Tiles
These tiles are denser and stronger than ceramic tiles while also being resistant to scratches and stains. We recommend porcelain tiles for areas with high footfall.
Vitrified Tiles
Vitrified tiles are known for their strength, durability, and resistance to stains and moisture. Double-charged vitrified tiles are also an option if you are putting longevity as your priority.
Taking Measurement Of The Area
The next step is to measure the space you want to tile after you have decided on the tiles. This will help you determine the precise amount of space required for the installation. But before that, make sure to compile your pre-requisites for measurements. Here’s the supply list for you:-
- A measurement tape (the long one)
- A Notepad or Pencil
- A Basic Calculator
Done with supplies? Now, before you get to the measuring part, ensure the area is clear of any obstacles. Move furniture to the center of the room and keep pets away. If you can’t clear the entire space, ensure the tape can move straight without bending around objects.
Let’s start measuring:
If your Room is a Rectangle/Square
Pick your measuring tape and start measuring from one corner of the room to the other corner. Measure the length and width if the room is rectangular and if it’s square, just measure the length and you’ll be good to go.
If your room is round
To find the diameter of the circle, extend your tape measure across the center, starting from one wall and running through the middle of the room to the opposite side. The diameter represents the total length through the center of your circle. When calculating the number of floor tiles needed, you will need to determine the radius, which is half of the diameter you measured earlier – essentially, the distance from one wall to another.
If your Room has an Irregular Shape
Consider dividing the space into sections that make geometric sense. For example, an L-shaped floor can be split into two rectangles, and a trapezium-shaped room can be divided into triangles and rectangles, etc.
Pro Tip: Make sure you add 10% extra length and width in the measurement to ensure complete coverage. During tile installation, if the tile gets chipped or damaged, you should have extra tiles to cope with the situation.
How to Find the Number of Tiles: Step-by-Step Tile Calculator
As you cover all the above instructions, you can do the calculations using our step-by-step tile calculator. Here are the stages to follow:
Calculate the Total Area
Compute the total area of the room you just measured to determine how many floor tiles are needed. This will give you the total square footage, measured in inches, for every area you plan to tile.
If you have a rectangular/ square room:
Multiply the length by the breadth of the room, then divide the result by 144 to get the total area in square feet. A square room will make things much easier because it has the same width and length.
If you have a circular room:
Calculate the radius by dividing the total length in inches by two. For easier calculations, round up to the nearest whole number. Multiply the rounded radius by pi (approximately 3.14). To find the total in square feet, round up to the next decimal point.
Apply them to the formula
Now that you have the floor area calculated, it’s time to apply the tile calculation formula.
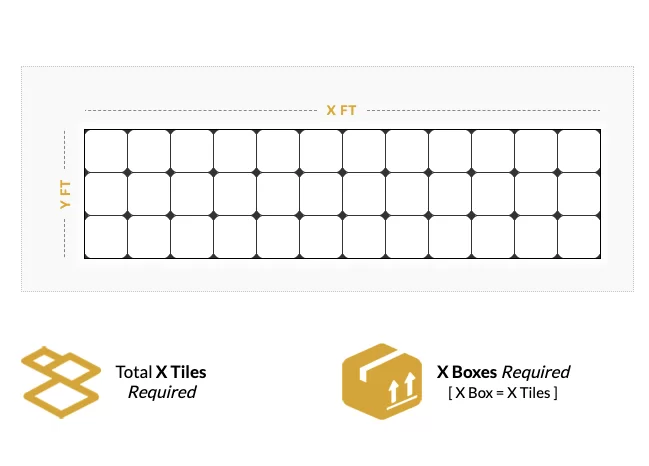
You must divide the floor area by the area of each tile to determine the total number of tiles. When you buy tiles, you will find the dimensions of each tile mentioned on the tile box itself. So, you have both the areas noted, put the numbers in the formula given below:
Number of tiles = Area of the floor / Area of tile
Lastly, review your tile-laying strategy to accurately assess your overall tile requirements. For complex patterns like herringbone or 45-degree tile runs that involve multiple cuts, we recommend increasing your coverage to at least 15%.
Wrapping Up
Renovation can be tiring, but calculating tile requirements doesn’t have to be. Simplify the process with a systematic approach given in the above article and don’t miss to explore Lavish Ceramics for quality tiles that meet your diverse needs effortlessly.
Similar Articles


That which is unique is always rare and special, so is with the finesse of Lavish tiles. Lavish is synonymous with excellent quality tiles that define the beauty of a well tiled space. One of the largest manufacturer and exporter of ceramic tiles, wall tiles and floor tiles, double charge vitrified tiles, polished glazed vitrified tiles, glazed vitrified tiles and digital tiles, Lavish is famous for adding that sense of grandeur and splendor through sheer product quality.


Leave a Reply